How to Connect Canon Printer to Mac and Windows
Canon is a popular brand for making electronic devices including cameras, printers, computers, scanners, and more. It has been a favorite manufacturer since years for most of the people due to its high quality products.
These printers work with almost every type of operating systems such as Windows, Mac, Linux, etc. Printing from Canon printers is always easier and convenient.
If you have bought a new printer and you don’t know how to connect it. And you are looking for the detailed guide regarding how to connect a Canon printer to Mac and Windows, then in this article we have explained the step by step process to connect your printer to both Windows and Mac operating systems.
The below mentioned steps will fully guide you to make a connection successfully with your PC. So let’s read!
Table of Contents
Install Canon Printer On Windows
If you’re not a technical person, still you can follow these simple steps so that you can easily and quickly install Canon printers on Windows.
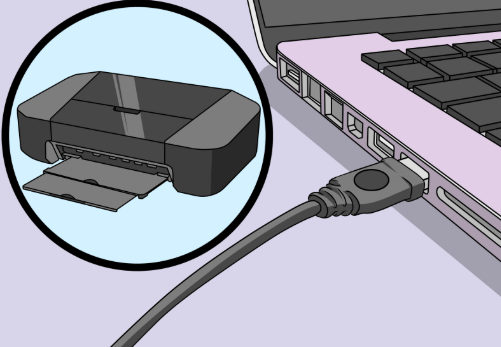
Connect your Canon printer to the Windows computer with the help of USB cable.
Now go to the “Control Panel” of your computer and select “Devices and Printers” option. A new screen will appear so right-click on the printer icon and then click on “Printer Properties”.
In the next step, go to the “Computer” option from the start menu and click on “Manage” option. You will find another option “Device Manager” in the left bar.
Then find your printer’s model click on it and select “Update Driver Software”.
You will see a pop-up window so click on the option named as “Browse my computer for driver software”.
Now complete the setup process by clicking on “ok” and “next” options. And finally, click on “Finish” option and then it is recommended to restart your PC once.
In the last step, go to the “Devices and Printers” and click on “Print test page”. Now, you are successfully done.
Install Canon Printer On Mac
After the installation of driver, now we will learn how to connect your printer with Mac in simple steps.
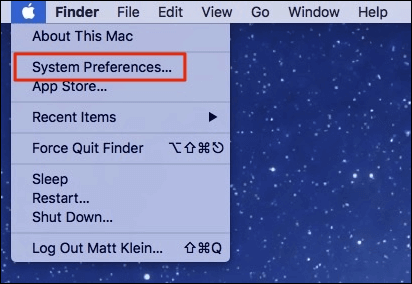
In the first step, go to the Apple menu and click on the Apple logo in the top left of your screen. And you will have A drop-down menu.
Once you have the menu, click on “System and Preferences”.
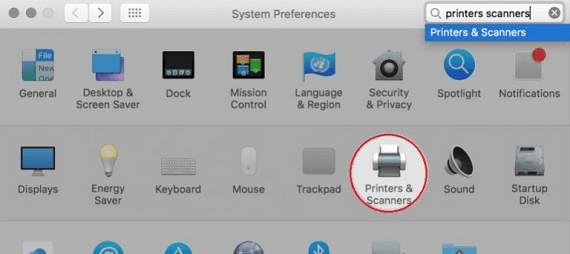
In the third step, click on “Printers and Scanners”.
Now click on the “Add button” which will appear in the bottom left corner of your laptop’s screen. As soon as you will finish this step, you will see a pop up window.
Lastly, a menu will appear on the screen, so you need to choose the printer’s name. Then, you will see “connected to the Mac” notification on the left side of the window. Hence your printer setup is now done!
Install Canon Printer Without CD On Mac
So you don’t have a CD for connecting Canon printers on Mac? You don’t need to worry anymore. We have come up with the solution. Here is an ultimate guide regarding which will help you to install a canon printer by using a USB cable on computer or WIFI on Mac.
Firstly, all you need is a USB cable to connect your printer with laptop or computer. However, if you don’t have a USB cable for your printer then you will need to install the software.
Now go to Canon’s website for the installation of software. It will take only a few moments. In the search bar, write your printer’s model and land onto the printer’s page.
Next, look for the software download link and click it.
The driver’s installation will begin automatically. Now Double-click the downloaded file and complete the installation process on the system. Once you are done with this, you can start printing now.
Related Post: How To Improve Print Quality
Canon Printer Most Common Connecting Issue With Solutions
There are many issues that occur while connecting the printer. So in order to connect the Canon printer first, you need to resolve these issues. So this part of the article will help you out in overcoming these connecting issues. So let’s discuss!
Cables and Connection Issues
The most common issue that everyone faces is due to the USB cables. It might be possible that your cable is not properly connected or maybe the connection is not tight enough and you have not noticed. So it is always recommended to check that every cable is connected with the system and always make sure that the connections are tight.
Network Issues
Printers that work with Windows and Macs sometimes cause some network issues with the computer. So if you are facing this issue and you’re unable to install Canon Printer on your PC. Then make sure that your computer and the printer are connected to the same wireless network. And then restart your computer once.
Driver Issues
Driver issues can be hectic if you are not familiar with printers much. In case, you are facing the issue of printing from the same application then we suggest you to try another program such as TextEdit (Mac OS X software program).
Furthermore, always ensure that your printer driver is up to date. Because sometimes, these issues are solved simply by updating the software.
Final Words
In this article, we discussed some simple steps by which you can easily connect your Canon’s printer on Windows or Mac computer. No matter whether you want to connect your printer with USB or without CD, this post will help you out.
We hope you liked our guide and this helped you in establishing a connection between your computer and printer. If still you have any queries, feel free to ask us below!
Related Post: How To Clean A Printer